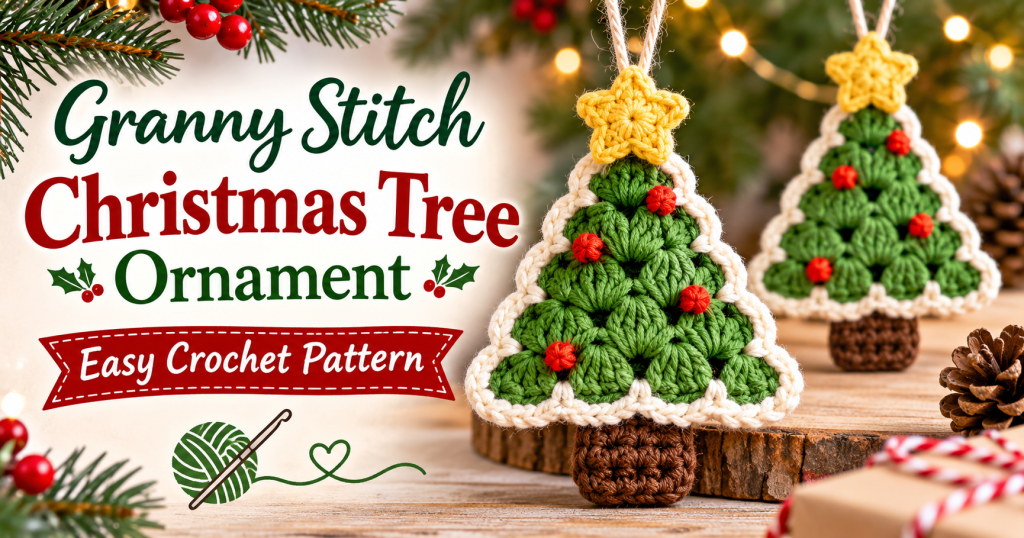
Looking for a cute handmade decoration to add a little warmth to your Christmas tree? This Granny Stitch Christmas Tree Ornament is a lovely project to make during the holiday season. It combines the classic granny stitch with a simple tree shape, creating a beautiful handmade ornament that looks charming on any Christmas tree.
This crochet Christmas tree ornament is lightweight, beginner-friendly, and doesn’t require much yarn. You can make it in traditional Christmas green, add a little gold or red decoration, or experiment with different colors to match your holiday decorations.
The best part? You can make several of these little trees in one evening. Use them as Christmas tree decorations, gift toppers, handmade gifts, or even combine them into a festive crochet garland.
Why You’ll Love This Granny Stitch Christmas Tree
There are plenty of reasons to add this little crochet project to your Christmas collection.
- Beginner-friendly: The pattern uses basic crochet stitches and familiar granny clusters.
- Quick project: A single ornament can be completed in approximately 30–45 minutes.
- Budget-friendly: You only need a small amount of leftover yarn.
- Customizable: Change the colors, add beads, or decorate with tiny bows.
- Perfect for gifting: Handmade Christmas ornaments make thoughtful little presents.
Whether you’re an experienced crocheter or just learning the granny stitch, this project is a fun way to create something festive.
Materials You’ll Need
Before starting, gather the following supplies:
- Green DK weight yarn (approximately 15–20 yards).
- 3.5 mm crochet hook.
- Small amount of brown yarn for the tree trunk.
- Red or gold embroidery thread for decoration.
- Yarn needle.
- Scissors.
- Stitch marker (optional).
- Thin ribbon or cotton cord for hanging.
Optional decorations:
- Small wooden beads.
- Miniature buttons.
- Gold embroidery thread.
- Tiny decorative stars.
Cotton yarn is a great choice because it gives the ornament a neat stitch definition and helps it maintain its shape.
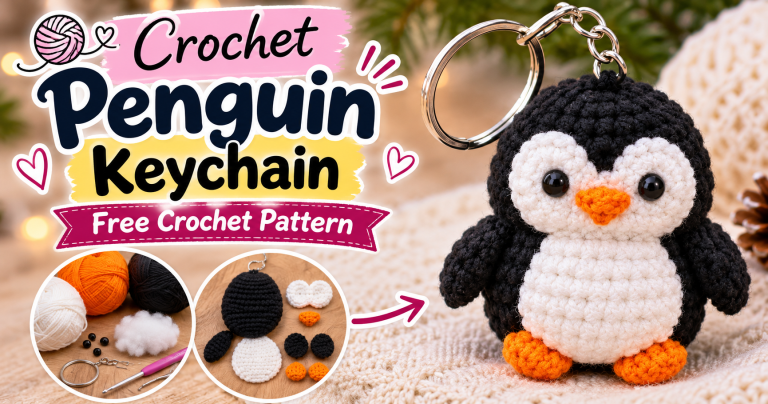
Related : Crochet Penguin Keychain Pattern , Cute Mini Amigurumi
Finished Size
Using DK-weight yarn and a 3.5 mm crochet hook, the finished ornament measures approximately:
- Height: 4–4.5 inches (10–11.5 cm).
- Width: 3.5–4 inches (9–10 cm).
The final measurements may vary depending on your yarn, hook size, and personal tension.
If you want a smaller ornament, try sport-weight yarn with a 2.5–3 mm hook. For a larger Christmas decoration, use worsted-weight yarn and a 4–4.5 mm hook.
Crochet Abbreviations (US Terms)
This pattern uses standard US crochet terminology.
- ch – Chain
- dc – Double crochet
- sc – Single crochet
- sl st – Slip stitch
- st – Stitch
- sts – Stitches
- sp – Space
- rep – Repeat
- FO – Fasten off
Granny Cluster: Three double crochet stitches worked into the same stitch or chain space.
Before You Begin
The tree is crocheted from the top down, using simple granny clusters to create a triangular shape.
Each new row becomes wider by adding one granny cluster. This gradually creates the familiar silhouette of a Christmas tree.
Remember to turn your work at the end of every row.
Step-by-Step Granny Stitch Christmas Tree Pattern
Step 1: Create the Top of the Tree
Using green yarn:
Row 1:
- Ch 4.
- Work 2 dc into the fourth chain from the hook.
- The beginning chain counts as the first dc.
- You should have one granny cluster of 3 dc.
- Turn your work.
This creates the small pointed top of your Christmas tree.
Step 2: Begin Increasing the Tree
Row 2:
- Ch 3 (counts as the first dc).
- Work 2 dc into the first stitch.
- Ch 1.
- Work 3 dc into the top of the turning chain from the previous row.
- Turn.
You now have 2 granny clusters.
Row 3:
- Ch 3.
- Work 2 dc into the first stitch.
- Ch 1.
- Work 3 dc into the next chain space.
- Ch 1.
- Work 3 dc into the top of the turning chain.
- Turn.
You now have 3 granny clusters.
Step 3: Continue Building the Christmas Tree
Continue increasing the tree using the same technique.
For each new row:
- Begin with ch 3 and 2 dc into the first stitch.
- Work 3 dc into each chain space across.
- Finish with 3 dc into the top of the turning chain.
- Turn your work.
Continue until you reach Row 6.
Your cluster counts should look like this:
| Row | Granny Clusters |
|---|---|
| Row 1 | 1 |
| Row 2 | 2 |
| Row 3 | 3 |
| Row 4 | 4 |
| Row 5 | 5 |
| Row 6 | 6 |
You should now have a small triangular crochet piece resembling a Christmas tree.
Fasten off the green yarn and weave in the loose ends.
Step 4: Add a Crochet Border
A neat border gives your ornament a more finished appearance.
Using green or contrasting white yarn:
- Join the yarn at one corner of the tree.
- Ch 1.
- Work sc stitches evenly around the outside edges.
- Work 3 sc into the bottom corner to create a neat turn.
- Continue around the remaining sides.
- Sl st into the first sc to close the border.
- Fasten off and weave in the ends.
Try to keep your stitches evenly spaced. If the edges start curling, loosen your tension slightly.
Step 5: Crochet the Tree Trunk
To make the trunk, use brown yarn.
- Join brown yarn at the center of the bottom edge.
- Ch 1.
- Work 4 sc across the center stitches.
- Ch 1 and turn.
- Work 4 sc across.
- Repeat for 2–3 rows, depending on the trunk height you prefer.
- Fasten off.
You can also make the trunk separately and sew it onto the back of the tree.
Related ; Spiral Crochet Christmas Tree Ornament Pattern PDF, Rustic Holiday Decoration
Step 6: Add the Hanging Loop
To hang your crochet Christmas tree ornament, attach a small piece of yarn or cotton cord to the top.
- Cut approximately 6 inches of yarn.
- Fold it in half.
- Insert both ends through the top of the tree.
- Tie a secure knot.
- Adjust the loop to your preferred length.
Make sure the loop is securely attached before hanging the ornament.
Finishing Touches and Christmas Decorations
Now comes the fun part: decorating your little crochet tree!
Here are a few ideas to make every ornament unique.
Add a tiny bow: Attach a small red ribbon bow to the front of the tree for a traditional Christmas look.
Use gold details: Sew tiny gold stitches across the granny clusters to create the appearance of Christmas lights.
Add a little star: Sew a small decorative star onto the top of the tree.
Create a snowy effect: Use white yarn for the border to give your ornament a winter-inspired appearance.
Add miniature beads: Small red, gold, and white beads can make beautiful Christmas baubles.
Remember to secure all small decorations firmly, especially if the ornaments will be displayed where children or pets can reach them.
Creative Ways to Use Your Crochet Christmas Tree
This little project is more versatile than you might think.
Here are some creative ways to use your finished ornaments:
| Idea | How to Use It |
|---|---|
| Christmas tree decoration | Hang it directly on your Christmas tree. |
| Gift topper | Attach it to wrapped Christmas presents. |
| Holiday garland | Make several trees and connect them with yarn. |
| Handmade gift | Include one in a Christmas gift basket. |
| Table decoration | Place a few ornaments around your holiday centerpiece. |
| Stocking decoration | Sew one onto a decorative Christmas stocking. |
You can also make a collection of trees in different sizes and colors for a coordinated handmade Christmas display.
Troubleshooting: Common Crochet Problems
Why Does My Christmas Tree Look Uneven?
Uneven tension is usually the main reason. Make sure you’re working the same number of granny clusters in every row and keeping your chain spaces consistent.
Blocking your finished piece can also help straighten the edges.
Why Are the Edges Curling?
Your stitches may be too tight. Try using a slightly larger crochet hook or relaxing your tension when working the border.
Why Does My Tree Look Too Small?
Different yarn weights and crochet hooks can change the finished measurements. Try DK yarn with a 3.5 mm hook or use a thicker yarn for a larger ornament.
How Can I Make My Ornament Stiffer?
Light blocking with fabric-safe spray starch can help the tree maintain its shape. Always follow the product instructions and allow it to dry completely.
Frequently Asked Questions
Is this granny stitch Christmas tree suitable for beginners?
Yes! The pattern uses basic crochet stitches, including chain, double crochet, and single crochet. If you already know how to make a granny square, you’ll find the main stitch technique familiar.
How long does it take to crochet one Christmas tree ornament?
Most crocheters can finish one ornament in approximately 30–45 minutes, depending on their experience and decorating choices.
Can I use leftover yarn?
Absolutely! This is a great stash-busting project. Small amounts of green, brown, red, and white yarn are more than enough.
Can I make this ornament in different colors?
Yes. Traditional green looks beautiful, but white, cream, red, gold, and even pastel colors can create lovely holiday decorations.
Can I sell finished crochet Christmas tree ornaments?
You can sell your own finished handmade ornaments, provided you have the appropriate rights to the pattern and comply with any applicable pattern-specific terms. Do not sell or redistribute someone else’s written pattern or photographs as your own.
How do I keep my crochet Christmas tree flat?
Use consistent tension, avoid making the border too tight, and gently block the finished piece if necessary.
Final Thoughts
Crocheting your own Christmas decorations is a wonderful way to bring a personal touch to the holiday season. This Granny Stitch Christmas Tree Ornament is simple, affordable, and fun to customize.
You don’t need expensive materials or complicated techniques to create something beautiful. A little green yarn, a crochet hook, and some creativity are enough to make a lovely handmade decoration.
Make one for your Christmas tree, create a matching set for your friends, or turn several little trees into a festive garland.
Happy crocheting, and enjoy making your Christmas a little more handmade!