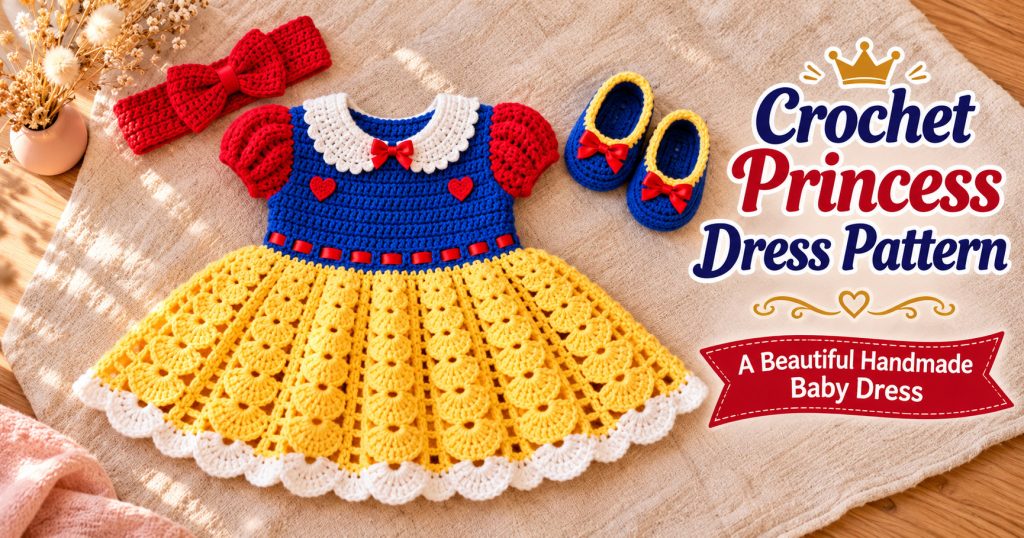
There is something special about a handmade baby dress. Every little detail, from the delicate crochet stitches to the soft, flowing skirt, makes it feel even more precious. If you love creating beautiful outfits for little ones, this crochet princess dress pattern is a lovely project to add to your collection.
Designed with a charming bodice, a flared skirt, delicate sleeves, and decorative finishing touches, this dress is perfect for birthdays, family celebrations, photoshoots, and other special occasions.
The best part? You can customize the colors, add your favorite embellishments, and make a unique little outfit that will be treasured for years.
Whether you’re an experienced crocheter or looking for your next rewarding project, let’s explore how to make this adorable baby princess dress.
Why You’ll Love This Crochet Princess Dress
This dress combines classic crochet techniques with a beautiful princess-inspired design.
Here are a few reasons to try it:
- Beautiful design: A fitted upper section and a flowing skirt create a lovely silhouette.
- Customizable colors: Choose pink, lavender, cream, white, or any combination you love.
- Special occasion outfit: Perfect for birthdays, celebrations, and memorable photographs.
- Handmade gift idea: A thoughtful present for baby showers and new parents.
- Creative freedom: Add bows, flowers, ribbons, or decorative borders to make it your own.
Materials You’ll Need
Before starting, prepare the following supplies:
| Material | Details |
|---|---|
| Yarn | Soft baby cotton or lightweight acrylic yarn |
| Main color | Approximately 150–200 yards |
| Skirt color | Approximately 150–200 yards |
| Decorative color | Small amount for details |
| Crochet hook | 4 mm or 4.5 mm |
| Stitch markers | To mark important sections |
| Tapestry needle | For weaving in loose ends |
| Scissors | For cutting yarn |
| Buttons | Optional, for the back closure |
| Ribbon | Optional waist decoration |
Yarn recommendation: Choose a soft, breathable yarn suitable for delicate baby clothing. Cotton blends are particularly nice because they feel comfortable against the skin.
Crochet Skill Level
Skill level: Beginner to Intermediate
You should be comfortable with basic crochet stitches and simple shaping techniques.
The main stitches used in this project include:
- Chain stitch (ch)
- Slip stitch (sl st)
- Single crochet (sc)
- Half double crochet (hdc)
- Double crochet (dc)
- Increase (inc)
- Shell stitch
If you already know how to make basic crochet garments, you’ll find this project enjoyable.
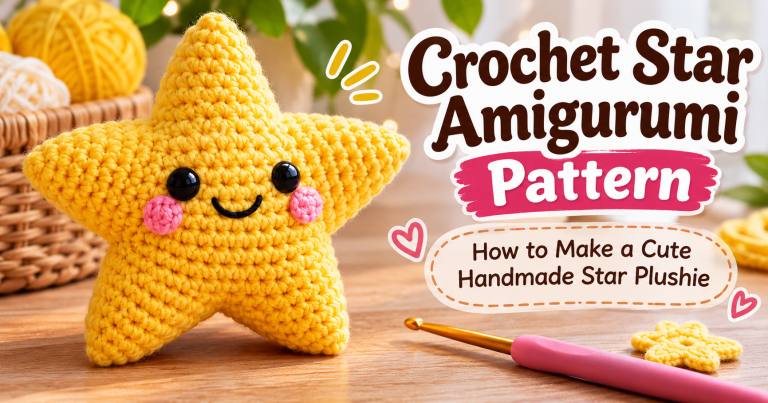
Related : Crochet Star Amigurumi Pattern , Cute Star Plushie Tutorial
Choosing the Right Size
Baby clothing sizes can vary depending on the yarn, hook, and individual baby’s measurements.
Here is a general size guide:
| Age | Approximate Chest |
|---|---|
| 0–3 months | 16 inches |
| 3–6 months | 17 inches |
| 6–12 months | 18 inches |
| 12–18 months | 19 inches |
These measurements are approximate. Always measure the baby whenever possible and allow enough room for comfortable movement.
Crochet Princess Dress Pattern: Step-by-Step Guide
This design is worked from the top down, beginning with the bodice before moving on to the skirt.
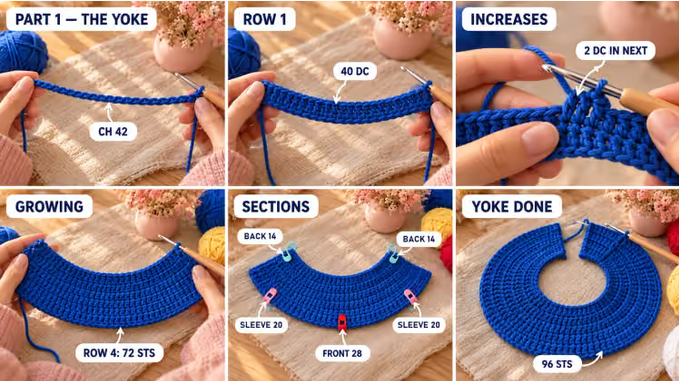
Step 1: Create the Upper Bodice
Start with your main yarn color.
- Make a foundation chain that comfortably fits the baby’s neckline.
- Work double crochet stitches across the chain.
- Continue with additional rows, gradually increasing stitches to shape the upper section.
- Check the width around the baby’s chest as you work.
- Continue until the bodice reaches the desired length.
Keep your stitches consistent to create a smooth and comfortable finish.
Step 2: Shape the Armholes
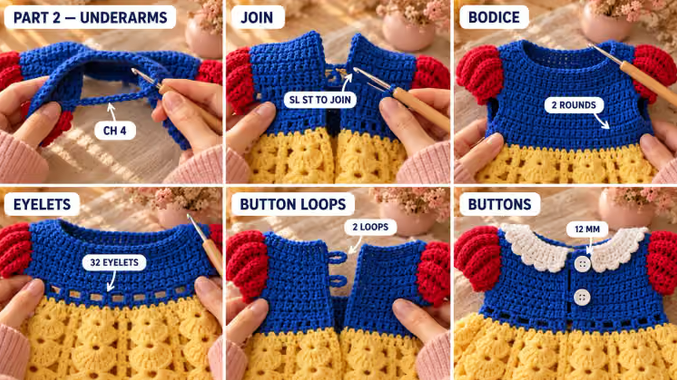
Once the upper section is wide enough, divide the stitches into three main sections:
- Front bodice
- First sleeve opening
- Back bodice and second sleeve opening
Skip the stitches reserved for the sleeves and connect the front and back sections with small chain spaces underneath each arm.
Continue working around the body to complete the lower bodice.
Step 3: Create the Waistline
Work one or two rounds of double crochet stitches around the bodice.
For a decorative waistline, you can add a round of chain spaces by alternating double crochet stitches with chain stitches.
These spaces can later be used to weave a soft decorative ribbon through the waist.
Step 4: Crochet the Flared Princess Skirt
This is where the dress begins to take on its beautiful princess appearance.
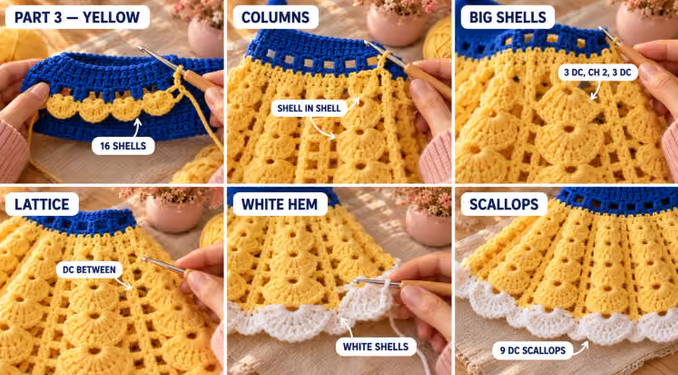
Change to your chosen skirt color.
The shell stitch is a wonderful choice because it creates a soft, flowing texture.
To create a basic shell:
- Work several double crochet stitches into the same stitch or space.
- Skip the appropriate stitches.
- Repeat the shell pattern around the skirt.
Continue working in rounds, gradually increasing the number of stitches or using larger shell clusters to create a wider skirt.
You can make the skirt short and playful or extend it for a more traditional princess look.
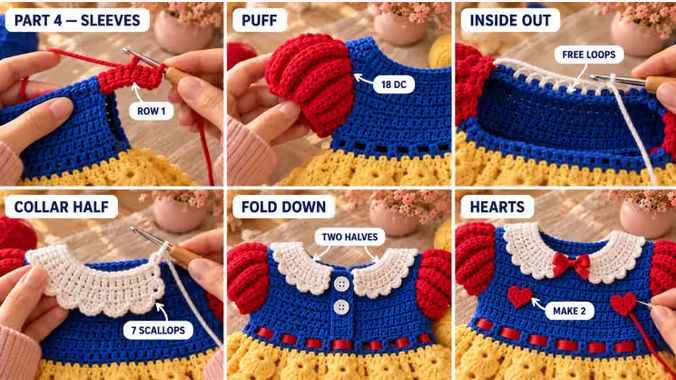
Step 5: Add Decorative Sleeves
Return to the sleeve openings and attach your chosen yarn color.
You can create short puff-style sleeves using a combination of double crochet increases and small finishing rows.
For a simpler design, work a few rounds of single crochet or half double crochet around each armhole.
Finish with a contrasting border to give the sleeves a neat appearance.
Step 6: Add a Beautiful Collar
A small decorative collar can completely transform the appearance of the dress.
Using white or cream yarn:
- Attach the yarn around the neckline.
- Work a row of single crochet stitches.
- Add a decorative scalloped edge using double crochet stitches.
- Repeat evenly around the neckline.
Make sure the collar is soft and does not feel tight around the baby’s neck.
Related : Christmas Granny Square Crochet Pattern, Festive Holiday Design (PDF Download)
Step 7: Finish the Skirt Edging
For the final touch, add a decorative border around the bottom of the skirt.
You can choose:
- Scalloped crochet edging.
- Shell stitch edging.
- Simple picot edging.
- A contrasting single crochet border.
A white or cream-colored border looks especially beautiful against a pastel skirt.
Step 8: Final Details
Now it’s time to personalize your creation.
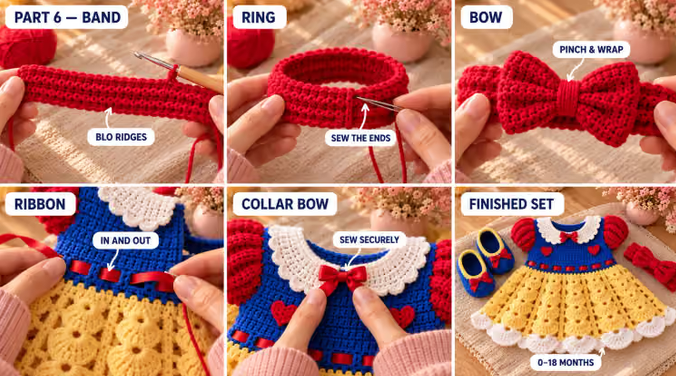
Consider adding:
- A small crochet flower at the waist.
- A decorative bow.
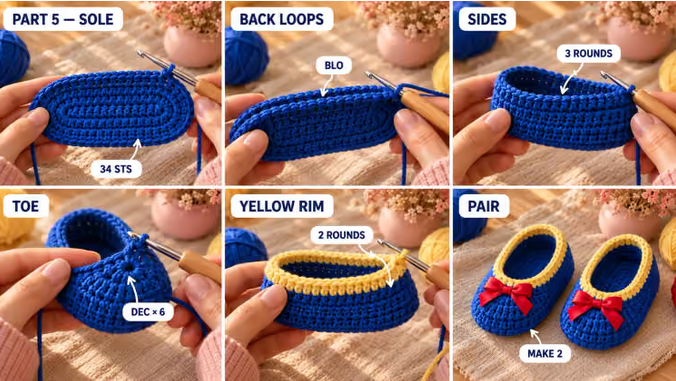
- A matching crochet headband.
- Small floral appliqués.
- A contrasting ribbon detail.
Secure every decorative element carefully. Avoid loose buttons, beads, or detachable decorations that could become choking hazards.
Beautiful Color Combinations to Try
One of the nicest things about making your own crochet princess dress is choosing the colors.
Here are some lovely combinations:
| Style | Color Combination |
|---|---|
| Classic Princess | Pink and White |
| Royal Princess | Purple and Silver |
| Elegant Baby | Cream and Blush Pink |
| Floral Princess | Lavender and White |
| Sweet Pastel | Mint and Soft Yellow |
| Vintage Style | Dusty Rose and Ivory |
You can also experiment with different yarn textures to create a completely different look.
Helpful Tips for Better Results
Before finishing your dress, keep these suggestions in mind:
1. Make a gauge swatch
A small test piece helps you check your stitch size and avoid unexpected sizing problems.
2. Choose comfortable yarn
Baby clothing should feel soft and breathable. Avoid rough or scratchy materials.
3. Check the measurements
Don’t rely only on age labels. Babies grow at different rates, so measurements are more reliable.
4. Keep your tension consistent
Uneven tension can make the skirt look irregular or cause the bodice to fit poorly.
5. Finish your edges carefully
A clean neckline, armhole, and skirt border will give your finished dress a more professional appearance.
Frequently Asked Questions
Is this crochet princess dress suitable for beginners?
It is best suited to beginners who already understand basic crochet stitches. The shaping and skirt construction may require a little practice.
What yarn is best for a baby crochet dress?
Soft cotton, cotton blends, and baby-friendly lightweight acrylic yarn are all good options. Choose a material that is comfortable and easy to care for.
Can I make the dress in different sizes?
Yes. You can adjust the foundation measurements, bodice width, armhole placement, and skirt length to create different sizes. Always make a gauge swatch before changing the measurements.
How long does it take to crochet a princess dress?
Depending on your experience, stitch pattern, and finishing details, the project may take several hours or a few days to complete.
Can I sell dresses made using my own version of this design?
You can generally sell handmade finished items you create, but check the terms of any pattern, yarn brand, or design inspiration you use. Do not claim someone else’s pattern as your own.
How should I wash a handmade baby dress?
Follow the yarn manufacturer’s care instructions. Gentle hand washing and laying the garment flat to dry are often suitable options.
Final Thoughts
A crochet princess dress is more than just another handmade clothing project. It’s an opportunity to create something beautiful, personal, and full of thoughtful details.
From choosing the perfect yarn colors to adding the final decorative touches, every step gives you room to express your creativity.
Whether you’re making one for your little princess or creating a special handmade gift, this design is a wonderful way to turn simple yarn into something memorable.
Happy crocheting!
Crocht – Creative Crochet Ideas, Patterns & Inspiration.