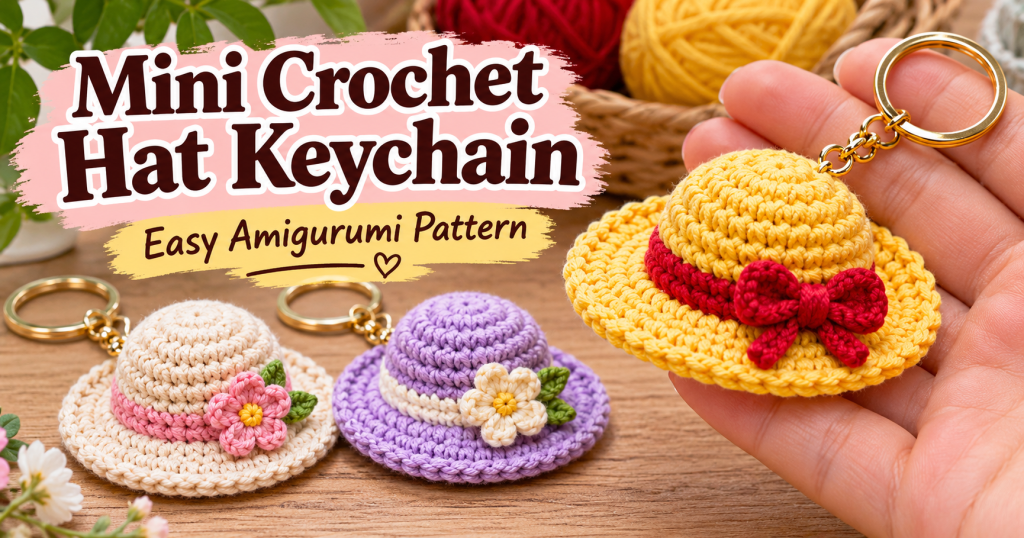
Looking for a small, adorable crochet project that you can finish in an afternoon? This Mini Crochet Sun Hat Keychain is a charming little accessory that combines the beauty of handmade crochet with the practicality of an everyday keychain.
Inspired by classic summer straw hats, this miniature design features a rounded crown, a colorful decorative band, and a beautifully shaped wide brim. Despite its tiny size, it has plenty of personality and makes a lovely addition to your keys, handbag, backpack, or gift collection.
The best part? You don’t need complicated techniques or expensive materials to make one. With basic crochet stitches, a little cotton yarn, and a small crochet hook, you can create your own miniature sun hat.
Whether you’re a beginner exploring amigurumi or an experienced crocheter looking for a quick project, this pattern is a fun way to use leftover yarn and create something special.
Why You’ll Love This Mini Crochet Hat
There are many reasons to add this little crochet accessory to your project list.
- Quick to make: A great small project for an afternoon of crocheting.
- Beginner-friendly: Uses basic stitches and simple increases.
- Perfect for leftover yarn: Requires only small amounts of cotton yarn.
- Customizable: Experiment with different colors, bands, and decorative details.
- Great handmade gift: Perfect for birthdays, party favors, and small surprises.
- Ideal for selling: Finished keychains can make attractive handmade market products.
The miniature size also makes it a wonderful project for practicing your amigurumi shaping techniques.
Finished Size
Using DK cotton yarn and a 2.5 mm crochet hook, the finished mini hat measures approximately:
- Brim diameter: 7–8 cm (2.75–3.15 inches).
- Crown diameter: 3–3.5 cm (1.2–1.4 inches).
- Crown height: Approximately 3 cm (1.2 inches).
Your final measurements may vary depending on your yarn, hook size, and personal crochet tension.
Materials You’ll Need
Before starting, gather the following supplies:
Yarn
- Yellow cotton yarn for the main hat.
- Red or dark pink cotton yarn for the decorative band.
- Small amounts of optional yarn for additional decorations.
Crochet Tools
- 2.5 mm crochet hook.
- Stitch marker.
- Yarn needle.
- Sharp scissors.
- Small amount of polyester fiberfill.
- Metal split key ring or small lobster clasp.
Cotton yarn is recommended because it creates defined stitches and helps the miniature hat maintain its shape.
Crochet Abbreviations
This pattern uses standard US crochet terminology.
- MR – Magic Ring
- CH – Chain
- SC – Single Crochet
- INC – Increase (2 SC in the same stitch)
- SL ST – Slip Stitch
- FLO – Front Loop Only
- ST – Stitch
- R – Round
Important: Work the hat in continuous spiral rounds unless otherwise indicated. Use a stitch marker to identify the beginning of each round.
Mini Crochet Sun Hat Pattern
Part 1: Creating the Hat Crown
Start with your main color (yellow).
The crown is worked from the top downward, gradually increasing to create a rounded miniature hat shape.
Round 1: Make a magic ring and crochet 8 SC into the ring. (8)
Round 2: INC in every stitch around. (16)
Round 3: Repeat (1 SC, INC) around. (24)
Round 4: Repeat (2 SC, INC) around. (32)
Round 5: SC in every stitch around. (32)
Round 6: SC in every stitch around. (32)
Round 7: SC in every stitch around. (32)
At this stage, your crochet piece should look like a small rounded cup. This forms the crown of your miniature sun hat.
Part 2: Adding the Decorative Hat Band
Now it’s time to introduce your second color.
Change to red, pink, brown, or any color that complements your main yarn.
Round 8: SC in every stitch around. (32)
Round 9: SC in every stitch around. (32)
Fasten off the contrasting color and return to your main color.
For a more realistic straw-hat appearance, keep the decorative band relatively narrow. You can also add a tiny embroidered bow later.
Part 3: Crocheting the Wide Hat Brim
This is the part that gives the miniature hat its recognizable summer look.
The brim is worked outward from the bottom of the crown. The first round is crocheted through the front loops only to help create a clean transition.
Round 10: Working in FLO, repeat (3 SC, INC) around. (40)
Round 11: Repeat (4 SC, INC) around. (48)
Round 12: Repeat (5 SC, INC) around. (56)
SL ST into the next stitch and fasten off.
Lay your hat on a flat surface and gently arrange the brim.
It should extend outward around the crown rather than curling upward. If it curls, check your tension and make sure the increases are distributed evenly.
Part 4: Making the Underside of the Brim
To give your keychain a more professional finish, create a second flat circle that will cover the underside.
Using your main yarn, follow these rounds:
Round 1: MR, 8 SC. (8)
Round 2: INC around. (16)
Round 3: Repeat (1 SC, INC) around. (24)
Round 4: Repeat (2 SC, INC) around. (32)
Round 5: Repeat (3 SC, INC) around. (40)
Round 6: Repeat (4 SC, INC) around. (48)
Round 7: Repeat (5 SC, INC) around. (56)
Fasten off, leaving a long yarn tail for finishing if you prefer sewing the two pieces together.
Place the circle underneath the hat brim and check that both edges match.
Part 5: Joining the Two Brim Layers
Place the underside circle against the bottom of the hat.
Make sure the edges are aligned properly.
Using your crochet hook or yarn needle, join the two layers with single crochet stitches or a neat whipstitch.
Before completely closing the brim, add a tiny amount of fiberfill inside the crown.
Avoid overstuffing. Too much filling can stretch the stitches and distort the shape.
Once the two layers are securely joined, weave in all loose yarn ends.
You should now have a miniature hat with a rounded crown and a firm double-layer brim.
Part 6: Attaching the Keychain Ring
Your crochet hat is almost finished!
To turn it into a practical keychain, create a small attachment loop using matching yarn.
- Identify the back of the hat.
- Attach your yarn securely between the two brim layers.
- Chain approximately 8–10 stitches.
- Attach the chain back to its starting point.
- Reinforce the base with several small sewing stitches.
- Attach a metal split ring or lobster clasp through the loop.
Make sure the attachment is firmly secured. Keychains are handled frequently, so a strong connection is essential.
Finishing Touches and Decoration Ideas
A few small details can make your miniature crochet sun hat look even more attractive.
Here are some creative ideas:
1. Add a Tiny Crochet Bow
Create a small bow using contrasting yarn and sew it onto the decorative band.
2. Try a Different Color Combination
Instead of the traditional yellow and red combination, experiment with:
- Cream and dusty pink.
- Beige and chocolate brown.
- White and pastel blue.
- Lavender and soft purple.
- Natural beige and sage green.
3. Add a Decorative Flower
A tiny crochet flower attached to the side of the crown can give your keychain a cute summer-inspired appearance.
4. Create a Beach-Themed Collection
Make several miniature hats using different colors and sell them as part of a coordinated summer accessory collection.
Common Crochet Problems and How to Fix Them
Even simple crochet projects can present a few challenges. Here are some solutions to the most common problems.
Why Is My Crochet Hat Brim Curling Up?
A curling brim usually indicates that the piece needs more width or that your stitches are too tight.
Check your stitch counts and make sure every increase is completed correctly.
You can also experiment with a slightly larger crochet hook for the brim.
Why Does My Hat Look Too Flat?
The crown may need more height or a little additional stuffing.
Check that you completed all the straight rounds before starting the decorative band.
Add a small amount of fiberfill to create a fuller appearance.
Why Does My Crochet Brim Look Wavy?
Excessive increases or loose tension can cause the brim to ripple.
Check the stitch counts carefully and maintain consistent tension throughout each round.
How Can I Make My Keychain More Durable?
Use strong cotton yarn, reinforce the attachment loop, and secure all loose ends carefully.
The connection between the crochet piece and the metal ring is especially important because it experiences repeated pulling.
Creative Ways to Use Your Mini Crochet Sun Hat
This little project is more versatile than it might seem.
Here are a few ways to enjoy your finished creation:
- Attach it to your everyday keys.
- Use it as a decorative handbag charm.
- Add it to a backpack or travel bag.
- Include it in handmade gift boxes.
- Use it as a summer party favor.
- Create matching accessories for friends and family.
You can even make several versions with different colors and decorations to build a small handmade collection.
Frequently Asked Questions
Is this mini crochet hat suitable for beginners?
Yes. The project uses basic stitches such as single crochet, increases, and slip stitches. Beginners who understand how to work in rounds should be able to follow the instructions.
How much yarn do I need?
Only a small amount of DK cotton yarn is required. This makes the project perfect for using leftover yarn from larger crochet projects.
Can I use acrylic yarn instead of cotton?
Yes. Acrylic yarn can work, although cotton generally provides better stitch definition and a firmer finish for miniature accessories.
Can I make the hat bigger?
Absolutely. Try using a thicker yarn and a larger crochet hook. You can also add additional increase rounds to create a wider crown and brim.
Can I use this project as a handbag charm?
Yes. Simply replace the traditional key ring with a lobster clasp or swivel hook to make it easier to attach to bags.
Can I sell finished crochet hat keychains?
You can create finished handmade accessories for personal use or sale. If you use someone else’s crochet pattern, always check and follow that designer’s licensing terms. For commercial production, creating and documenting your own original design is a good practice.
Final Thoughts
This Mini Crochet Sun Hat Keychain proves that even the smallest crochet projects can be full of charm and creativity.
With its rounded crown, colorful decorative band, and wide brim, it makes a lovely handmade accessory that is both practical and decorative.
Whether you’re making one for yourself, preparing a thoughtful handmade gift, or experimenting with new products for your crochet collection, this little sun hat is a project worth trying.
Choose your favorite colors, take your time with the finishing details, and enjoy creating something completely handmade.
Happy Crocheting!